Choreographers Toolbox
January 6, 2022Stop Motion Animation
January 7, 2022
Augmented Reality
..... By Christopher Hunt
OVERVIEW
This worksheet will introduce the basic functions of AR using the application Reality Composer which is available for free via the Appstore.

Open up the app and tap the Plus icon to create a new project.

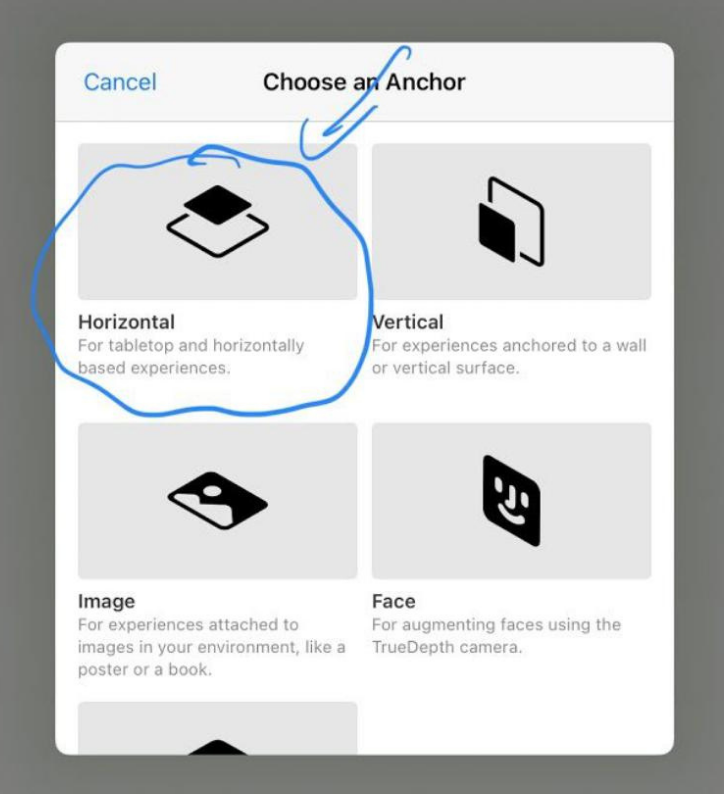
The app will then ask you to pick an Anchor – this is how your device understands where to place objects in AR. You will see a few options, but to start with pleases select the horizontal Anchor.

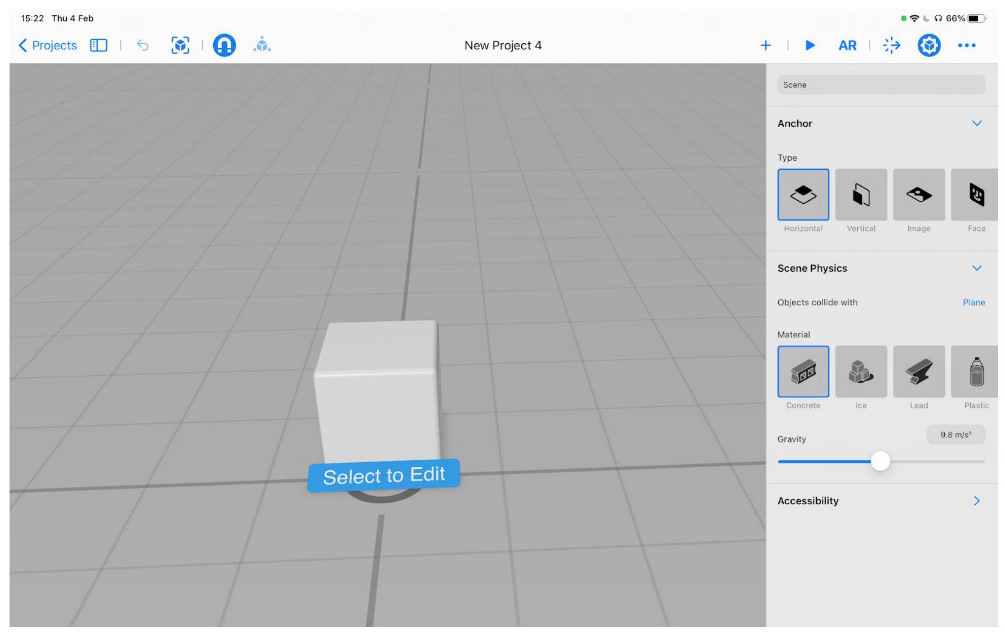
This will create a scene for you to start working with which should look something like the image >
(click to enlarge).

This is the editor view. It shows a 3D space where you can place and move objects previewing what you will see in AR. To move the cube in your scene, drag with one finger to rotate it, drag with two fingers to move the cube up, down, left and right, and pinch to zoom in and out.
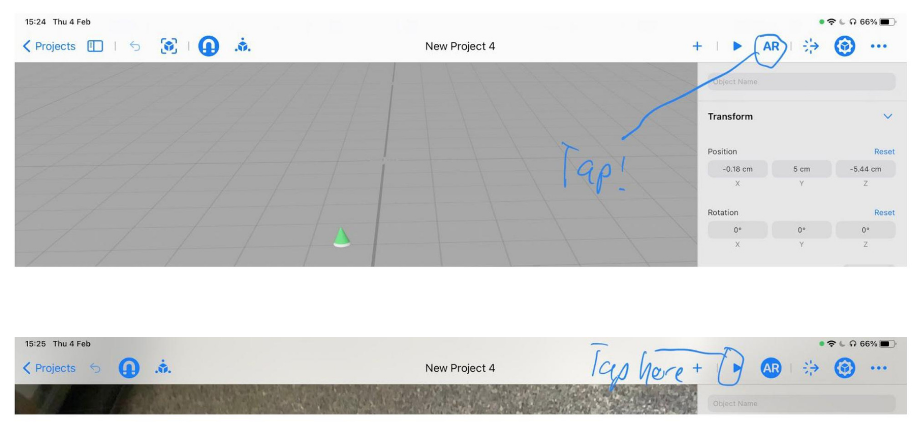
To see the cube in real life, tap the AR button in the top right then the play button once the camera has started. This will hide the menu so you can focus on the cube.

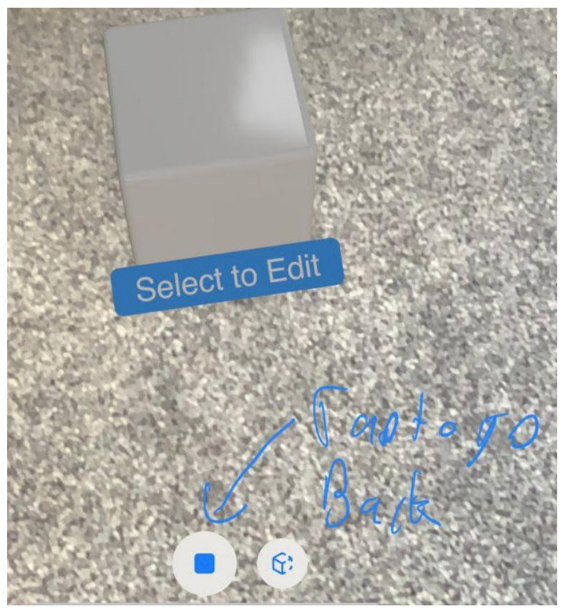
Move your device around looking at a floor or flat surface until the cube appears. Now you can move and walk around the cube in your space. It may move a little on its own if you are in a dark room. You can also move the cube around the floor by dragging it with your finger.
When you are done, tap the stop button to go back to the editor.

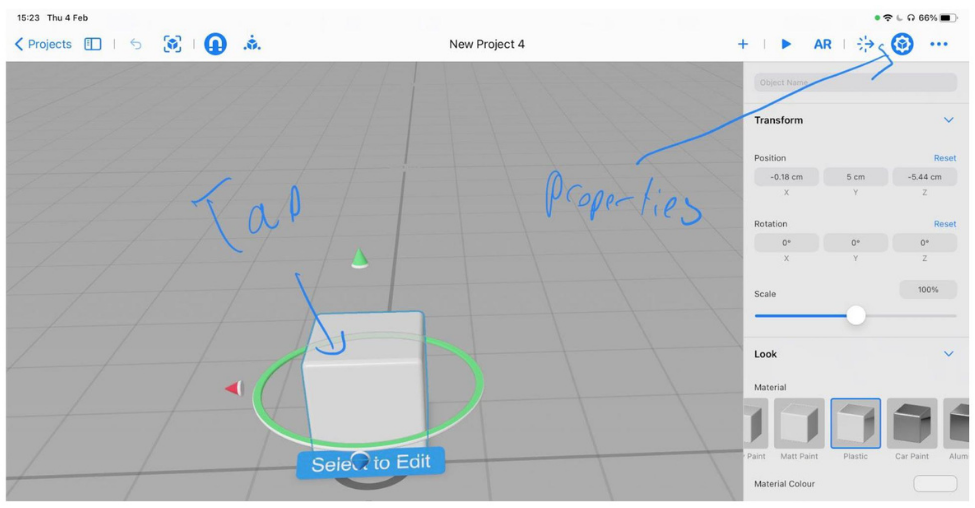
Next, you are going to make some changes to your cube. Tap the cube to select it, then tap the properties icon in the top right. This will show you some options on the right-hand side. These are all the changes you can make to your cube.
Have a play with these options and see what you can do with your cube! Place it back into AR mode to see the changes on the real world.

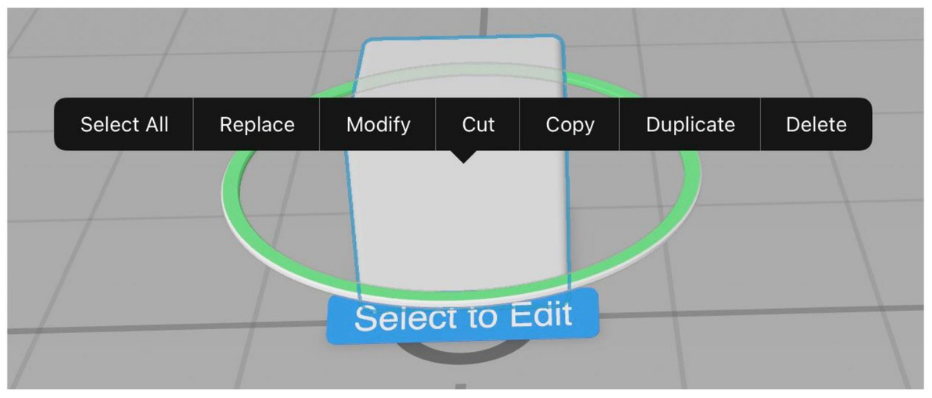
Now you have experimented with the cube, it is time to implement your own objects! To delete the cube, hold down on it and you will see some more options in black – tap delete to remove the cube.

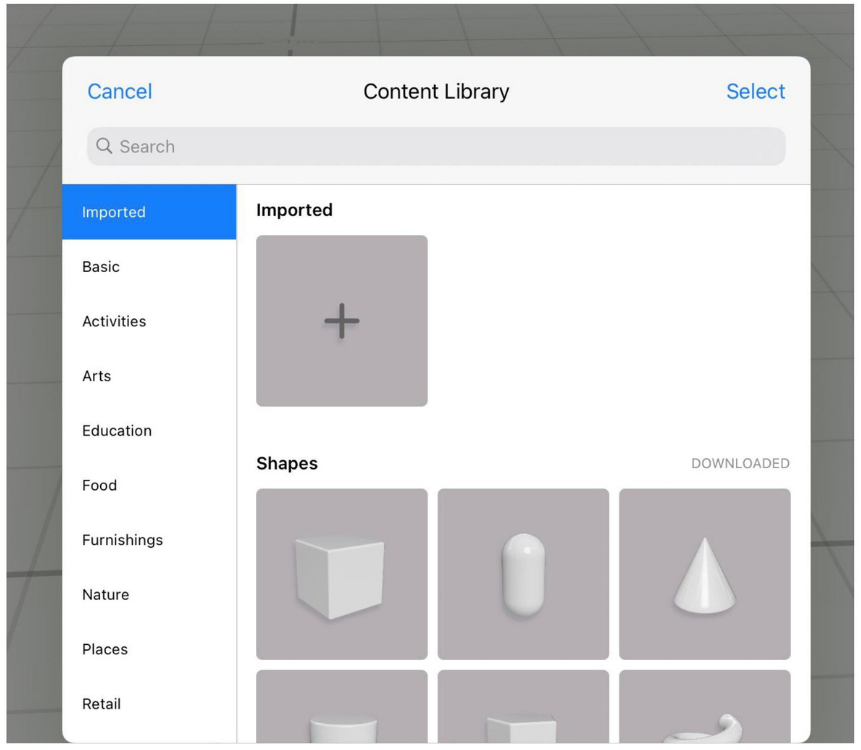
To add a new object, tap the plus button in the top right. This will open a new window which allows you to select a new object to add.

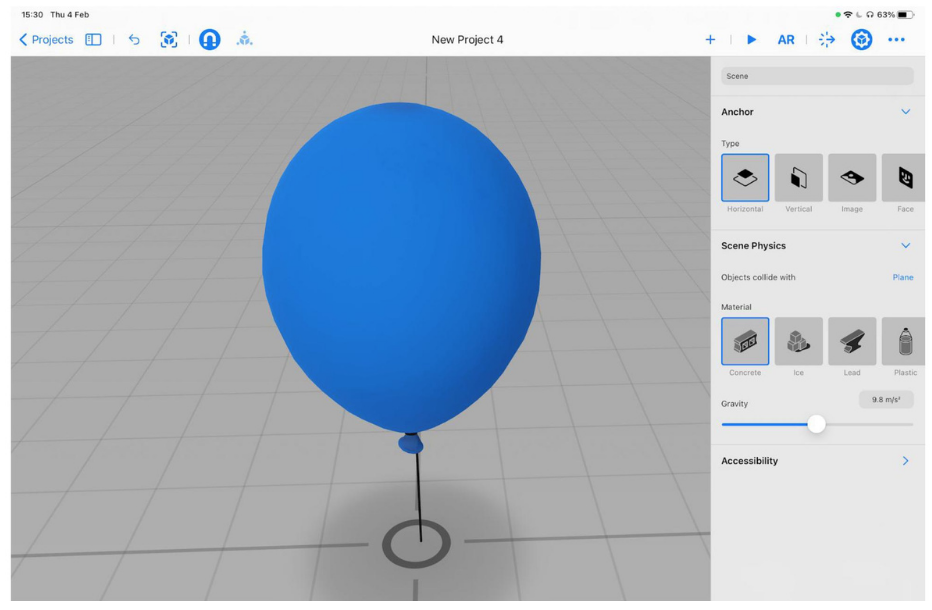
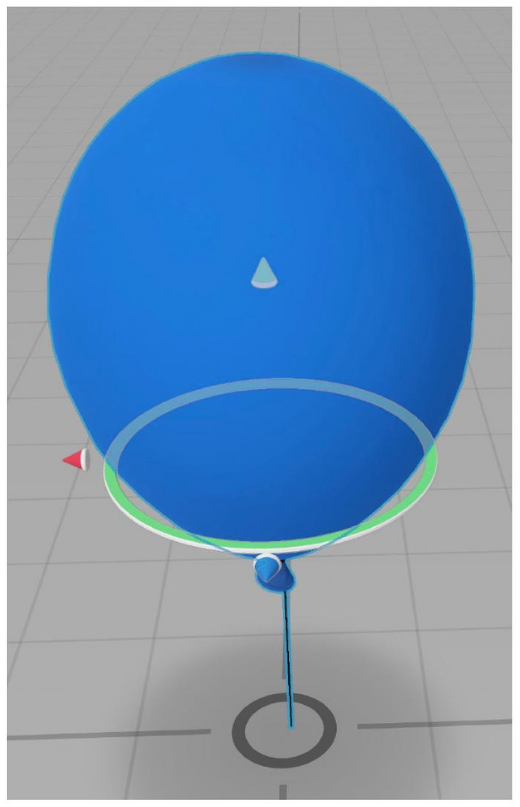
Have an explore – the app comes with lots of 3D objects for you to play around with. Each has their own set of properties and things you can change. I’ve scrolled down and picked a balloon – just tap on the object you want to add, and it will be downloaded and added to the scene.

When you tap on the object to select it you’ll notice the arrows and the ring. These allow you to move the object around the scene which will be reflected in AR. The arrows allow you to move the object backwards and forwards in that direction by dragging it as well as rotating it.

Now you’ve got the basics, it’s time for you to let loose and play with it! Try adding more objects, adjusting their properties and positions and see what you can create!


 Next, you are going to make some changes to your cube. Tap the cube to select it, then tap the properties icon in the top right. This will show you some options on the right-hand side. These are all the changes you can make to your cube.


